
How to Integrate and Visualize 3D Models in Ionic with Angular
In this article, you will learn how to add 3D objects to your Ionic project to enhance and improve your mobile applications. Discover step-by-step how to integrate 3D elements and provide a more dynamic and engaging experience for your users.
1. Run the following command to create a new project in Ionic. Choose Angular and NgModules.
C:\Users\User>ionic start twebbs3D tabs --capacitor
2. Add Three.js to your project:
C:\Users\User>cd twebbs3D
C:\Users\User\twebbs3D>npm install three
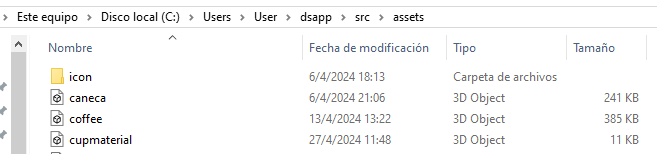
3. Add your 3D model to your project. In this example, we copied and pasted the cupmaterial.glb file into our assets folder. Make sure to use the correct extension (.glb).
4. Create a component to load your 3D model. To generate the component, use the following command, replacing ‘vista3d’ with your component’s name:
C:\Users\User\twebbs3D>ionic generate component vista3d
5. Import the necessary dependencies into your component, such as Three.js and other required modules:
ElementRef: A tool provided by Angular to interact with the DOM, essential for directly manipulating elements in your applications.
ViewChild: Typically used to access child components or DOM elements directly, facilitating communication and manipulation from the parent component.
GLTFLoader: Allows us to load our 3D model, becoming a crucial tool for visualizing 3D models in web and mobile applications.
OrbitControls: Helps us manipulate 3D scenes, enabling the viewing of objects from different angles. Consequently, it enhances interactivity and the user experience when exploring 3D models.
Our imports will look like this:
import { Component, ElementRef, OnInit, ViewChild } from '@angular/core';
import * as THREE from 'three';
import { GLTFLoader } from 'three/examples/jsm/loaders/GLTFLoader';
import { OrbitControls } from 'three/examples/jsm/controls/OrbitControls';
If you encounter an error with the imports, you can run the following command:
C:\Users\User\twebbs3D>npm install --save-dev @types/threeYou may also need to include ‘typeRoots’: [‘node_modules/@types’] in your tsconfig.json file:
{
  "compileOnSave": false,
  "compilerOptions": {
    "typeRoots": ["node_modules/@types"],
    "baseUrl": "./",
6. Load your 3D model in your component.
export class Vista3dComponent  implements OnInit {
  @ViewChild('showContainer', { static: true }) rendererContainer!: ElementRef;
  constructor() { }

  ngOnInit(): void {
    const scene = new THREE.Scene();
    const camera = new THREE.PerspectiveCamera(75, window.innerWidth / window.innerHeight, 0.1, 1000);
    const renderer = new THREE.WebGLRenderer();
    renderer.setSize(window.innerWidth, window.innerHeight);
    renderer.setSize(window.innerWidth * 1, window.innerHeight * 0.8); // Ajusta el tamaño
    this.rendererContainer.nativeElement.appendChild(renderer.domElement);

    renderer.setClearColor(0x555555); // Establece el color de fondo

    // A continuación debes indicar la ruta de tu modelo
    const loader = new GLTFLoader();
    loader.load('assets/cupmaterial.glb', function (glb) {

     // Tu objeto
     const object = glb.scene;
     console.log(object)


  object.scale.set(0.2, 0.2, 0.2); // Estable la escala que necesites.
    // Así añadimos el objeto en nuestra escena.
   if (object) {
      scene.add(object);
    }
  });

  const light = new THREE.PointLight(0xffffff, 1);
  light.position.set(2, 2, 5);
  scene.add(light);
  camera.position.z = 4;

  const light2 = new THREE.AmbientLight( 0xffffff, 1); // soft white light
scene.add( light2 );

    const controls = new OrbitControls(camera, renderer.domElement);
    controls.enableDamping = true; // optional smooth camera movement

    const animate = function () {
      requestAnimationFrame(animate);
      controls.update(); // update controls in animation loop
      renderer.render(scene, camera);
    };
    animate();
  }
}
7. Display your 3D model in your application.
Import your component into the tab1.module.ts file (or the module file where you want to display it). Don’t forget to add your component in the declarations section, as shown below:
Incorporate the component into the specific module file to ensure it displays correctly in your Ionic application.
import { Vista3dComponent } from '../vista3d/vista3d.component';

@NgModule({
  imports: [
    IonicModule,
    CommonModule,
    FormsModule,
    ExploreContainerComponentModule,
    Tab1PageRoutingModule
  ],
  declarations: [Tab1Page, Vista3dComponent]
})
export class Tab1PageModule {}
Post Comment